Last July I went down in the basement and found this mess around the chimney clean-out.

Yea WTF? see all those little back things in the red circles ????

Opened the door and found . . .

. . . one dead tree rat. Seems he got himself down the chimney and could not get back out. Probably met his demise when the furnace came on the first time. Oddly enough there was no smell. It must have all gone up the flue. He had been there long enough for the flies and maggots to do their thing. And what gave it away all the little black trails of the maggots crawling out of the gap in the door and finding places to hide in the basement floor cracks.

A massive week long basement clean out and disinfection ensued that led to me looking under my heating oil tank and seeing this . . . PANIC ensued.

. . . followed by acetone to clean and JB Weld Steel putty to patch long enough to find a more permanent solution. Estimates of $4000 were obtained to replace the tank . . . yea screw that.

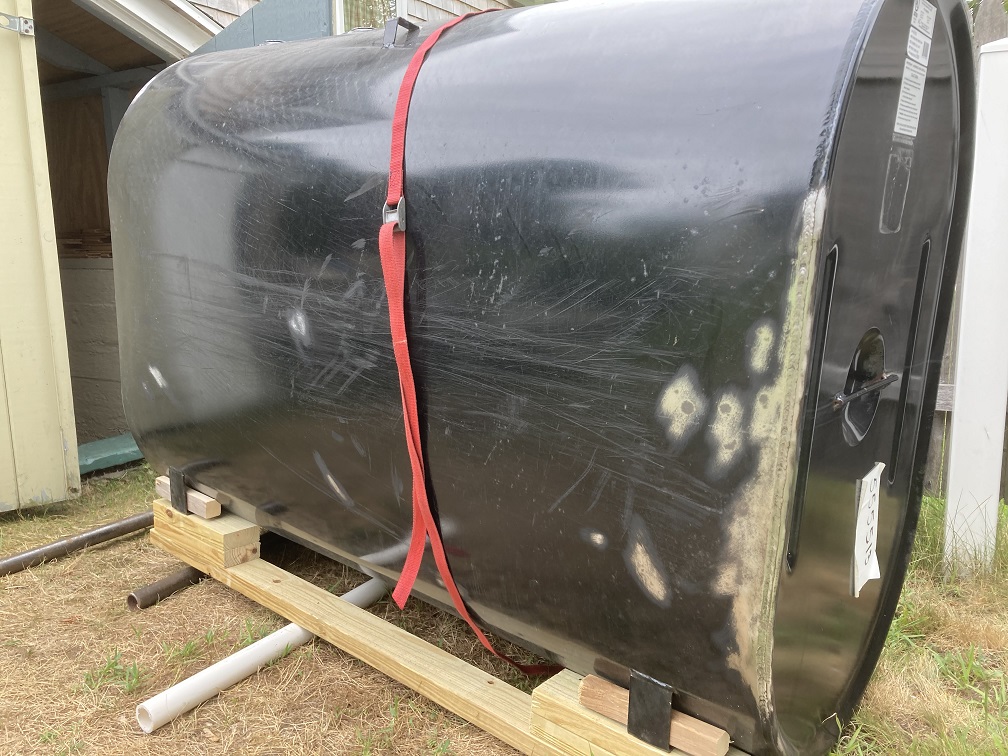
So off to Lowes for an 850$ tank. Note how its stored out in the weather. That's a major issue. If you can at all help it, do not ever buy a fuel oil tank that has been stored outside.

One 280 lb POS $850 chineseum tank arrives at home.

Meanwhile a cement mixing tub and some SpeedyDry oil absorbent at the ready should the JB Weld let go.

So I can get all my ducks in a row in regards to needed parts and pieces.

After some cogitating I figure I need to add some skids to make moving the 280 lbs easier once I get it on the ground.

And after an opportune visit by my friend Peter we manage to unload it by the basement dog house onto some rollers.
As it has been sitting out in the weather out back behind Lowes and has some traces of rust, before sending it down the stairs I hit it with the grinder and clean it of in preparation for some fresh paint.

And I pull one of the caps to see what it looks like inside and see this mess on the bung hole threads.

And find this mess inside . . . . yikes . So after sleeping on it overnight I touch up the bare spots I had cleaned off on the outside with some matching black paint and load it back in the truck, yea not easy, and take it back to Lowes to exchange for another one . But it was the last one they had. So OK gimme my money back then. But while helping the mook they sent to unload it from my truck I wrench my back good enough to be out of commission for a couple weeks.
I then went off to FW Webb where the pros shop and asked to buy a tank $100 more spendy than the last but its stored inside . The guy gives me the F.U. look and tells me right off that if I am not a licensed installer he wont sell it to me.
Well F&%$# you too then.
So my only choice around here now is Home Depot at $950

And get another one . This one according to the label made in Canada . Ok I figure that has to be better than the one from china . Its been parked outside too, but only for a couple months according to the MFG date on the label, and they don't want me to pull the bungs to look inside . So we load it and get it home and when I pull the bungs on it before I take it out of the truck I find its also a rusted POS.

So next day it goes back and I ask to get a third one, and tell them there is no way I am taking it without first looking inside. They already have my money anyhow. Yea its not perfect but not so bad as the first two.

You'd think they'd fog the inside with oil at the factory but no. Instead they puncture the bunghole on the drain hole to keep them from crushing in due to temperature changes during shipping and that explains why they rust out inside.

The third tank sits in the back of my truck under cover for a few weeks while I tackle the cement work I showed in the previous post and I can gather my courage up to move it in to the basement.

OK that's going better than I figured it would.

That's what it looks like from the other end.

Some manhandling gets it over the threshold.

Past the furnace and washing machine and over the supply line to the furnace.
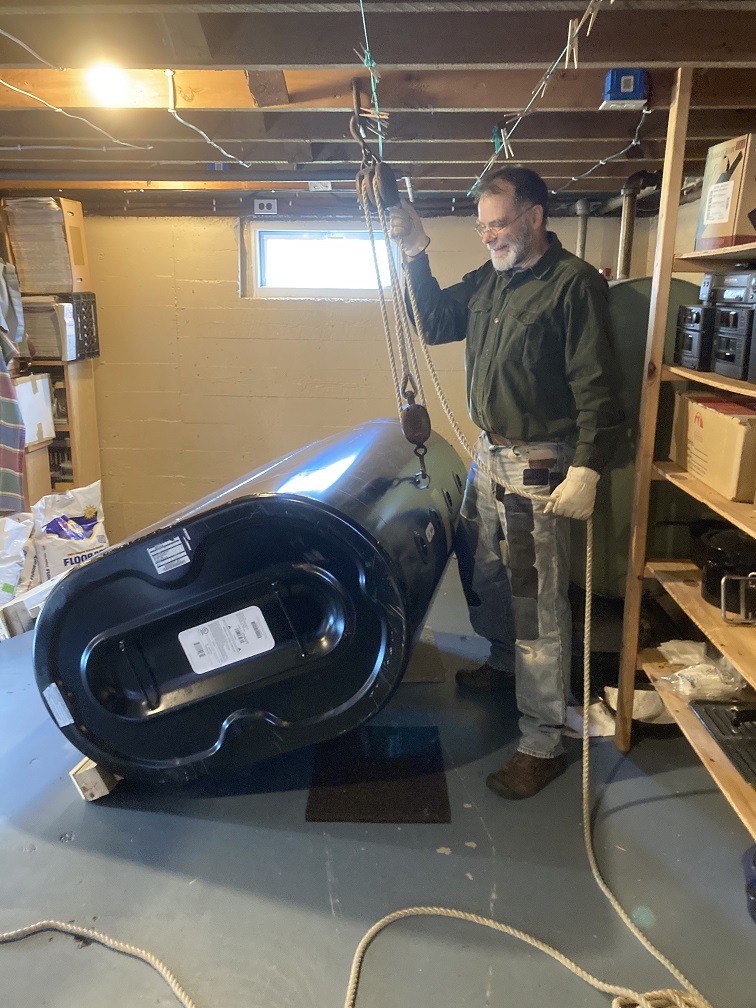
Near where I need it so I can flip it on its side, remove the skids and install the legs.

And let it sit there for about a month till the oil in the old tank gets disconcertingly low for the 17 deg F temps going on outside.

Turns out I wont really need those four 55 gallon vinegar drums I bought at $25 a pop from . . .

to transfer the oil into. Its all good though... I'll find a use for them.

By last Sunday I figured there had to be less than fifteen gallons left in the tank so on Tuesday the time finally came to do the deed I have been dreading for so long and hit the kill switch on the furnace.

Ran for a couple days on two of these rigs that barely kept the house at about 65 deg F.

Got my ducks in a row again and did the final install on the shut-off valve, FireOmatic and filter with the right pipe dope on the new tank.

And went to it with the saws-all to free the fill line, vent line, and the legs on the old tank that were cemented in the basement slab back in 1937 some time.

Once I separated the yellow supply line to the furnace there was no going back.

Moved the old tank out of the way.

And vacuumed seventy five years of grime and cobwebs out of the corner.

And got ready to move the new tank in place. The red things are pieces of one of those thin HDPE cutting boards to help slide the tanks on the slab.

Using my back to shift the tank over the uneven concrete slab in the corner.


The hardest part was the one I had not really given any thought to. Removing the old rusted fill and vent lines from the sill and getting the new ones in place. I beat on that SOB stub with a maul for about five minutes and it would not budge. Had to bore holes around it with a drill to free it from the sill. The new fill line would be two inch thick as code now requires.

As I had to slip the new tank back out of place to work on the sill I also installed the new combo gauge and whistle vent device in the tank.

Got the new two inch fill line mocked up and the feed line from the tank to the furnace connected.

And started to drain what was the last fourteen gallons out of the old tank.

Using the watering can to transfer the fuel oil turned out to be much more convenient than the five gallon pail. Poured about seven gallons of filtered fuel oil in the new tank.

Did the permanent install on the vent and fill pipes. Opened the new shut off and FireOmatic valves and purged the air out of the filter.

Went over to the furnace and hit the switch with the red face place and she fired right up . .
SUCCESS!
God does occasionally smile on fools and blind dogs . I got lucky and did not have to bleed it on the furnace end to get it to fire up , a detail I was unnecessarily worried about.

Installed the vent line and cleaned things up a bit. Did wind up running back to Homedepot a couple more times that evening to get all the parts I needed to finish up the fill and vent lines outside.

It was a two beer night and a well enjoyed hot shower.

Never was I so relieved to see the oil truck deliver six hundred fifty fifty dollars worth of oil as I was on Wednesday morning.

On Thursday I reinstalled the modified skirt board trim to fit the slightly altered location of the fill and vent pipes. My elation tempered by the disquieting news that mom had been rushed to the hospital with A-Fib symptoms on Tuesday.

I drained the last five gallons of oil out of the old tank.

Screened the debris and sludge out though a shop towel and poured it in the new tank. Yea call me a cheap bastard but at today's prices that was $25 worth of oil right there. About three or four days worth of heat for us.
Haven't added up all the bills yet but I'm pretty sure we came in around $1500 which means I saved about $2500 by doing the job myself, though I am sure I added a few more gray hairs in the process.
