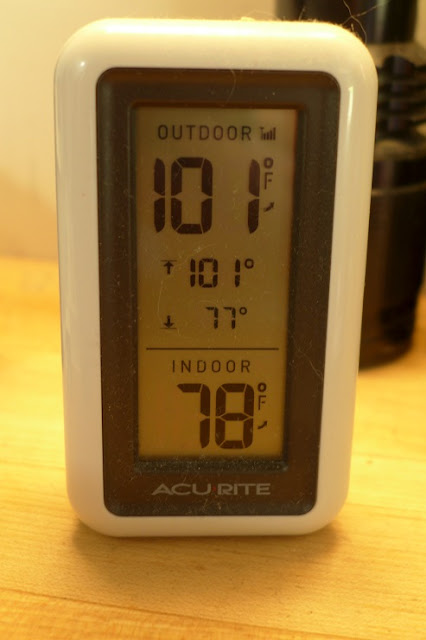
Been doing the rounds at the local events recently
Though this weekend's temps were a bit on the steamy side .
Seems the fifty seven year old plastic can only take so much heat before it gives . I had repaired a small crack under the hold down strap a few months back with some JB Weld , but with the extreme heat things just did not hold , and the little blue square of paper towel was wet, indicating my repair was leaking again .
The offending spot is almost undetectable in the top perimeter of that molded boss on the container
About a quarter inch long crack
Easier to see on the inside
The folks at the local NAPA give you the deer in the headlights look when you ask them for something like this . So a search for a replacement on the web provides this for a used one . . .
One hundred and five smackers by the time they get it to me? WTF ? No thanks .
I've seen a suitable arrangement on some older British cars
Nice idea hmmmmmm
Hmmm where have I seen such a container before ?
I do have one of those . . . I find my almost empty container of Purple PVC Primer, drain the remnants and wipe it out with some acetone to eliminate all traces of purple dye.
Five minutes on the wire wheel to delete the label
I also have a pile of these . . .
so we scrounge some suitable barbed fittings
After a quick run to the hardware store for a couple brass washers , I drill a hole in the middle of the bottom , brush all pieces with acid flux , tighten it all together and hit it with the torch and some silver solder .
That will do the trick .
Trace out and cut a silicone rubber gasket . . .
. . for the inside of the lid . . . oh yea, take it all apart again and hit the lid with the torch to remove the old brush stem .
Then drill a vent hole in the lid and screw in a fitting . . .
. . . with a gasket in there so the brake fluid wont slosh out .
Hit it with a coat of paint and let dry over night .
And install .
Got to love it when a plan comes together . And my total cost was about a dollar and fifty cents for a couple brass washers .


Como dirian tus amigos españoles, eres un pefecto 'manitas'. BTW, In the side view picture your Volvo looks very much like the american cars of the forties.
ReplyDeleteAccording to a book I recently acquired the design of the PV series of Volvos was influenced by the Tatra 77
Deletehttps://en.wikipedia.org/wiki/Tatra_77
and the Chrysler Airflow
https://en.wikipedia.org/wiki/Chrysler_Airflow
Though I always thought it looks like a 3/4 scale 1940s Chevy Fleetline
ttps://cdn.hswstatic.com/gif/1941-1942-chevrolet-fleetline-1.jpg
Nice fix -and it even looks good.
ReplyDeleteYea, it gets the job done and is a pleasing result.
DeleteWonderful work as always M. I truly elegant and simple fix that only a whiz kid could come up with.
ReplyDeleteI am definitely not the sharpest pencil in the box, but every now and then I have my moment of brilliance, usually followed by a spectacular crash and burn.
DeleteI love a fix like this! looks better than the original. I'd spend all my time doing stuff like this if I could! so satisfying!
ReplyDeleteHi Kev, yea, repairs like this are fun, the problem is evident and the solution well defined. This week I have been dealing with far more elusive and ever frustrating ECU failure codes on a newer BMW. Shall do a write up next.
Delete