The latest project is a Kitchen remodel in a condominium /town-house for the same customer that I did the recent front door repair. In an effort to down size and save on cost she has bought a new condo but it was in need of some serious upgrades.
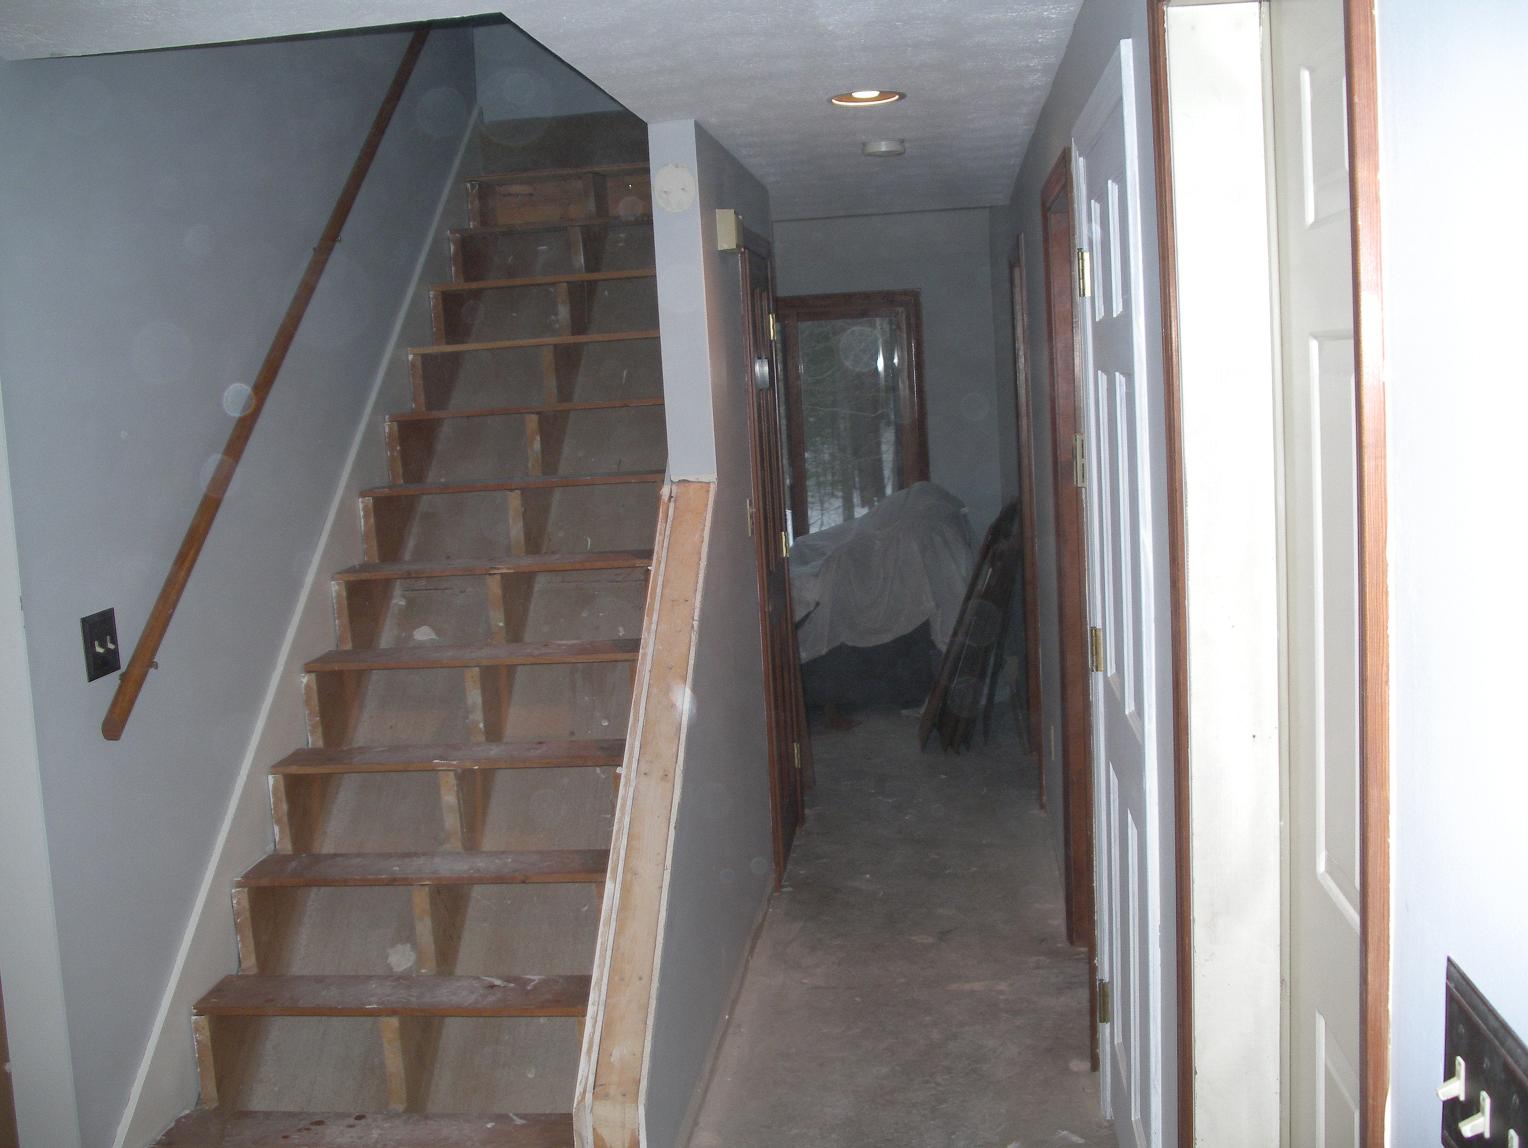
The customer purchased the kitchen and took out a line of credit at the big box store to pay for purchase and the instal by a vendor provided contractor. This put her darn near to the cost of her original much nicer home . In jumps her retired engineer dad to save the day and try to save on install costs that were likely 3 or 4 times the purchase cost of the cabinets. Father was doing some of the work but chose to get some help to do the actual kitchen instal. He gutted the old kitchen and was delayed trying to arrange for an electrician that never showed. In the end he did the wiring himself. When I arrived on scene it looked like this. The open areas in the ceiling had a soffit that he had removed in preparation for the new taller cabinets.
Monday he finished up the wiring while I demoed the glued in plywood treads and handrail on the stairs in preparation for new oak treads. Reusing the old risers as temporary treads for the time being til we get to the actual stair work.
Tuesday I did like a Frenchman, patched the kitchen drywall and mudded with fast set Durabond. By the end of the day it looked like this. For those that are not aware around these parts most drywallers are of French/ Quebecois descent.
The hard part was going to be matching the textured ceiling finish to the patched in soffits so we thought we would do a defined margin. Thus the blue masking tape. But this resulted in way to thick and unacceptable offset.
Wednesday morning we scraped the idea of a margin on the ceiling and decided to wing it on imitating the texture. Everything got a second coat of joint compound and I skimmed the ceiling margin smooth and by the end of the day it looked like this.
Thursday morning we found a tool/brush and successfully mixed paint and plaster in the right proportions to imitate the textured ceiling finish perfectly.
Then I started with the lower units instal. Typically I like to hang the
uppers first but due to the wet ceilings that was impossible and there
was a push to get the lowers in, so the granite guys could make patterns
for the counter tops asap. By the end of the day on Thursday we looked like this. The far right unit only in place but not yet affixed to the wall. Note also the lower cut out behind the left hand Lazy Susan corner unit with the conduit for water supply and drain lines for the dishwasher that goes to the left of the corner unit. On the cabinets to the right side of the sink I also installed conduit so that later we can put in a feed for the ice maker on the fridge unit.
The kitchen sink unit was a tricky one to fit with multiple holes for pipes and electrical.
Friday I had to get the right hand drawer unit installed and start the
uppers in order to get everything lined up with the end panel that
encases the fridge so that we could define the edge of the counter top. Next to the large fridge end panel is a unit that goes over the fridge and then a tall end pantry cabinet, both yet to be installed. Also on the list of issues successfully solved was the 240 volt outlet location for the stove as the existing location interfered with the unit itself.
An other tricky one was the free standing end cover to the left of the dishwasher with nothing to hold it in place but a ledger fastened to the concrete floor with the Ramset bang stick and a small ledger screwed to the wall where I could find studs. The clamp and 2x4 setting the spread to 24 inches for instal purposes only.
all in all a successful week, a lot accomplished in a short time with no major screw-ups . . .


looks like you got a lot done in a week and it looks good work. I've never liked fitting kitchens, I always find there's something major missing from the units and you have to wait an age to get it from the supplier.
ReplyDeleteI actually enjoy doing this sort of work. There are enough challenges along the way to keep the old noggin working. I have built a few kitchens from scratch but most folks like to be able to go to a store and see a display and say I want that. So I get to "fit" more of the store bought kind than I build. The lower boxes unfortunately are just melaime faced particleboard with oak face frames and doors. I was surprised to find the uppers were actually true plywood boxes.
ReplyDelete